What is the DS 160 Form? Purpose, Process & Tips| Niyo
What is the DS 160 form? Learn who needs it, how to fill it, the required documents, fee details, and submission tips for Indian visa applicants.
DS-160 Form Explained: Purpose, Process & Tips for Indian Applicants
The DS‑160 application form is the essential online non-immigrant visa application required by the U.S. Department of State. For Indian citizens planning to visit the U.S. for tourism, business, study, or work, accurate completion is crucial. This blog explains what the DS 160 form is, who must fill it out, how to navigate each step, what documents are needed, the costs involved, validity limits, and how to retrieve an existing application.
We’ve also included practical tips and addressed common pitfalls, ensuring you are well-prepared and confident throughout the process.
What is the DS-160 Form?
The DS-160, or Online Non-immigrant Visa Application, is a mandatory online form required for nearly all U.S. non-immigrant visas, including tourist (B-1/B-2), student (F), exchange (J), work (H-1 B, O-1), and others. If you’re wondering what the DS 160 form is, it’s essentially the first step in your U.S. visa journey. Hosted by the U.S. Department of State’s Consular Electronic Application Centre (CEAC), applicants must provide detailed information about their personal, travel, educational, work history, and background.
Filling this form accurately is essential, as consular officers use it to assess an applicant’s eligibility. It replaced several paper forms and has been entirely digital since 2007. Completing takes around 90 minutes and must be signed electronically—you cannot submit it offline or save it offline. Once submitted, you’ll get a confirmation page with a barcode that you’ll need for visa appointment scheduling.
In recent updates, applicants—especially those from India—must now list all social media usernames used in the past five years, and failure to do so may result in visa denial. While translations of questions are available to help, answers must be in English using Latin characters. If you’re preparing for your visa interview, understanding how to fill the DS 160 form correctly is one of the most critical parts of the process.
Who Needs to Complete Form DS-160?
Every Indian citizen applying for a temporary U.S. visa must complete the DS‑160 form unless they’re covered under a rare, emergency paper-based exception. This digital form is a non-negotiable part of the visa process and applies to the following categories:
- Tourists/business travellers (B‑1/B‑2 visas)
- Students (F‑1) and exchange participants (J‑1)
- Temporary workers under H, L, O, or P visa categories
- Fiancé(e) and cultural visa holders (K, Q visas)
- Transit visa applicants (C visas)
- Journalists and media professionals (I visas)
- Entertainers, athletes, and individuals with extraordinary abilities (P, O visas)
Who doesn’t need to fill the DS‑160?
- Those applying for immigrant (permanent) visas must instead use Form DS‑260.
- Individuals in rare situations are allowed to use paper Form DS‑156, only with prior approval from the U.S. consulate.
For most Indians, visa types such as B-1/B-2 (for tourism or business), F-1 (for students), H-1 B (for work), and J-1 (for exchange) are common. For all of these, correctly submitting the DS-160 is the first step before scheduling an interview or checking for Dropbox eligibility.
Why accuracy and compliance matter:
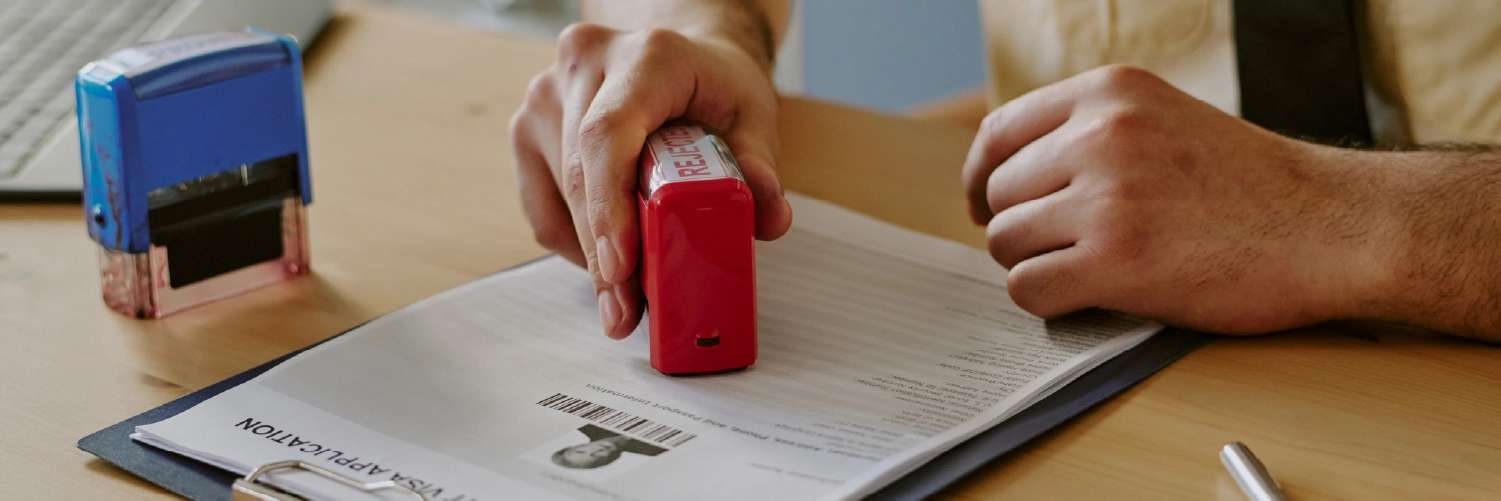
- Even one typo in the DS‑160 can result in a rejected application
- Leaving out your social media history from the past 5 years might raise red flags
- Providing incorrect travel history or employment details can lead to unnecessary delays, or worse, a denial
Many applicants also ask about the DS 160 form fee—while the form itself doesn’t cost anything to fill out, you’ll still need to pay the MRV fee to schedule your visa interview.
In case you lose access to your form or need to reprint the confirmation page, knowing how to retrieve DS 160 form becomes essential. Be sure to note your Application ID and save your work regularly—retrieving it later can save you from having to start over.
Completing the DS‑160 with care ensures you’re not just ticking a box—it shows you’re serious, truthful, and prepared for the next steps.
How to Fill the DS-160 Form: Step-by-Step Process
Start early and gather all the documents required for the DS-160—this includes your passport, travel itinerary (if applicable), previous visa information, a U.S. visa photo, and employment or academic details. Filling out the form typically takes about 90 minutes, and the system times out after 20 minutes of inactivity. Therefore, save your work frequently.
Here’s how to go about it
Start/ Retrieve Application
- Visit the CEAC website and click on “Start a New Application.”
- Note down your Application ID immediately.
- To access your form later (within 30 days), use your ID, date of birth, and surname, and answer your security question. This step is essential for DS 160 form retrieval in case you need to continue or reprint it later.
Select Embassy/Consulate
- Choose the U.S. embassy or consulate where you’ll apply.
- Don’t worry—you can schedule your interview at a different location if needed.
Enter Personal Details
- Provide your full name, date of birth, nationality, and passport details.
- Ensure the spellings match exactly as they appear on your passport.
Travel Information
- Mention the type of visa you’re applying for, the purpose of travel, expected travel dates, and where you’ll stay in the U.S.
Upload Photo
- Upload a recent photo meeting U.S. standards: 2 “x2”, white background, no shadows.
Provide Travel History
- List any U.S. trips made in the last five years.
- Disclose any previous visa denials or cancellations truthfully.
Family and Work/Education Background
- Share parent or spouse details, academic background, and current/previous employment history.
- Add reference details if asked.
Security Questions
- Answer questions related to criminal records, medical history, and security concerns honestly. These are crucial for verifying eligibility.
Social Media Section
- List all your usernames from the past five years.
- Omitting information here can lead to rejection, so be thorough in your approach.
Review, Sign & Submit
- Use the in-form review tool to avoid browser-related errors.
- Once you are satisfied, sign the form electronically and submit it. This generates a confirmation page with a barcode—please do not lose this.
Print Confirmation & Schedule Interview
- Save and print the confirmation PDF.
- You’ll need the barcode number to pay your visa fee and book the interview.
Tips:
- Save progress frequently to avoid session timeouts.
- Double-check passport number and name spelling.
- Once submitted, no changes can be made—so review carefully. Errors might force you to redo the entire form.
Lastly, keep in mind that DS 160 form validity is typically linked to the barcode confirmation. While the form doesn’t “expire” per se, the barcode is generally valid for one year or until used for a scheduled visa interview.
Key Documents Required for DS-160 Form
Before you begin filling out the DS-160, it’s essential to gather all the documents required for DS 160. This preparation not only saves time but also helps ensure that every detail you enter is accurate and correct. If you’re wondering how to fill the DS 160 form efficiently, having these documents on hand is the first step.
Keep the following ready:
- Passport: Must be valid for at least six months beyond your intended U.S. stay. Double-check the issue and expiry dates, as well as the passport number.
- Travel Itinerary: If you’ve booked your tickets, please keep your flight details and accommodation information ready. If not, estimated travel dates will do.
- Previous U.S. travel history: Include dates of past visits, entry/exit stamps, and any prior visa numbers you may have held.
- Photo: A recent digital photo (2 “x2”, white background, front-facing) that meets U.S. visa specifications.
- Personal, work, and education history: Be ready with names of institutions, job titles, durations of study or employment, and addresses.
- Social media usernames: List all active and inactive handles used in the past five years across platforms like Instagram, Facebook, LinkedIn, Twitter, etc.
Visa category-specific documents:
- F/J students: Form I‑20 or DS‑2019, along with your SEVIS ID.
- H‑1B, L visa holders: I‑129 petition approval notice and your employer’s contact/address details.
Optional documents for visa interviews:
- Employment verification letters
- Bank statements and financial records
- Property ownership documents
- Legal or medical certificates (if applicable)
These aren’t mandatory for the DS-160 itself, but they can strengthen your case during the visa interview.
Also, it’s a good idea to save your DS-160 Application ID and security question answer in a secure location. In case you need to pause and continue later—or reprint your confirmation—you’ll know exactly how to retrieve the DS 160 form without starting from scratch.
DS-160 Form Fees and Payment Information
Understanding the fee structure is essential while planning your U.S. visa application. Here’s how it works:
- The DS‑160 form fee
- It doesn’t exist in the traditional sense—filling and submitting the DS‑160 form is completely free. You won’t be charged anything during the online submission process itself. However, after submitting the form, you’ll need to pay the MRV (Machine Readable Visa) fee to schedule your visa interview. This is the actual cost associated with processing your application.
- MRV Fee Overview:
- For the most common visa types, such as B-1/B-2, F, J, and H, the standard fee is approximately USD 185 (₹15,000–₹16,000).
- Some nationalities may be required to pay an additional visa issuance or reciprocity fee after approval, although this is generally not applicable to Indian applicants.
Payment Steps:
- Complete your DS‑160 form and print the barcode confirmation page.
- Register on the USTravelDocs India portal
- Select a payment method—such as a bank branch (like SBI), NEFT, or digital options—to pay the MRV fee.
- You’ll receive an MRV receipt, which is valid for one year and is required to book your visa interview.
Key Guidelines to Remember:
- The MRV fee is non-refundable, even if your plans change or your application is delayed.
- The fee is non-transferable between applicants.
- Keep both the MRV receipt and the DS‑160 confirmation safe—they are mandatory at every step of the appointment process.
Why It Matters:
To schedule your U.S. visa interview, you will need both the MRV receipt and the DS-160 barcode. Showing up without either can result in your documents being rejected at the U.S. Embassy or the Visa Application Centre (VAC).
Also, remember that DS 160 form validity is generally tied to the barcode confirmation—it’s typically valid for up to one year or until the associated interview is completed. Keeping track of this timeline ensures you won’t have to refill the entire form if you delay your appointment.
DS-160 Form Validity & When to Submit
Once you electronically submit the DS‑160, the confirmation page with the barcode—your proof of submission—remains valid for up to one year or until the associated visa appointment is completed. This duration is often referred to as the DS 160 form validity. However, if the form remains inactive for too long without being scheduled, it may expire.
When to apply:
- Ideally, submit your DS‑160 just before booking your visa appointment.
- If your travel plans are confirmed, submitting the form 2–3 months in advance is generally a safe practice.
- Avoid submitting too early, especially if your travel dates, employer, or U.S. address are likely to change in the future. Any post-submission changes will require a new DS-160 and barcode, which also means rescheduling your appointment.
If changes occur after submission:
- Unfortunately, you can’t edit a submitted form. If you made an error or something changed, you’ll have to fill out a new DS‑160 entirely.
- When doing so, please let the consular officer know if the previous barcode has already been submitted. In most cases, they will still process your new form without requiring a new appointment.
Also, don’t forget to save your Application ID and the answer to your security question during the process. This makes DS 160 form retrieval easier if you need to reprint, review, or complete the form later, without starting from scratch.
In short, time your DS‑160 submission wisely—close enough to your appointment to ensure accuracy but not so far ahead that it risks becoming outdated.
How to Retrieve DS-160 Form?
If you’ve saved your DS-160 but haven’t submitted it yet, or if you need to reprint your confirmation page, here’s exactly how to retrieve the DS 160 form through the official U.S. portal:
Step-by-step retrieval:
- Visit the CEAC website and select “Retrieve an Application.”
- Enter the following details:
- Application ID (generated when you first started the form)
- Surname and year of birth
- The correct answer to your security question
What you can do:
- If your form is incomplete: You can resume filling it—as long as it’s within 30 days of your last save.
- If your form is already submitted: You can reprint the confirmation barcode page, which is essential for booking an interview.
Lost confirmation page? Use the “Retrieve Application” option on CEAC to access your submitted form and print a new confirmation copy. It’s best not to create a new DS‑160 unless there’s a genuine change in your details—using the same barcode helps avoid mismatches in the system.
Lost Application ID? Try recovering it through your email if CEAC sent you a copy. If not retrievable, you’ll need to start over. Please ensure that you print the new confirmation, as the older barcode will no longer be valid.
Keep in mind:
- Incomplete DS-160 sessions expire after 30 days of inactivity.
- Submitted forms remain accessible for the DS 160 form retrieval at any time during their validity.
Knowing how to retrieve the DS-160 form details can save you from the stress of redoing the entire application, so be sure to note down your credentials and keep them safe.
Conclusion
The DS‑160 is the cornerstone of your U.S. visa journey. For Indian applicants, a complete, accurate, and timely submission is key to a smooth process, especially amid increased scrutiny, such as the disclosure of social media history. If you’ve ever wondered what the DS 160 form is or been unsure how to fill the DS 160 form, this guide is designed to walk you through it with clarity and confidence.
We’ve covered everything you need to know—who needs to fill it out, the step-by-step process, the required documents, when to submit it, the fees involved, and how to retrieve your application if needed. Treat every detail with care: accurate data saves time, reduces stress, and projects confidence in the consular officer. Follow these steps, stay organised, and you’ll navigate this delicate process successfully and intelligently.
Frequently Asked Questions
If you’ve submitted your DS-160 and need to reprint the confirmation page or access your form, here’s how to retrieve DS 160 form:
- Visit the CEAC website.
- Click “Retrieve an Application.”
- Enter your Application ID, surname, birth year, and answer the security question.
This process ensures smooth DS 160 form retrieval if you’ve lost your barcode or confirmation page. If you can’t retrieve it, you may need to start a new application. Always save the confirmation PDF after submitting.
You can’t download the DS-160 form as a full PDF before submission. However, after completing the form, you can download and save:
- The confirmation page (with the barcode)
- The entire application is in PDF format (if needed for your records)
Go to the CEAC website, log in using your Application ID, and select the option to reprint or save your document. This is part of how to retrieve DS 160 form post-submission.
No, you cannot edit a DS-160 after it has been submitted. If you’ve made a mistake or your details change (such as your employer or travel plans), you’ll need to complete a new DS-160 application form.
Important notes:
- A new DS 160 form fee is not required if your interview is not rescheduled.
- Use the new barcode when updating your visa appointment.
- Inform the consulate during the interview if there’s a new form.
The DS 160 form validity is generally one year from the date of submission or until the associated visa interview is completed, whichever comes first.
If you don’t schedule your visa appointment within this period, you may need to fill out a new form. So it’s wise to time your submission close to when you plan to book your visa slot.
Pro tip: Use tools like Niyo Card to manage your international student or travel finances.
It’s recommended to submit your DS-160 application form at least a few days to a week before your visa interview. This ensures your barcode confirmation is active and linked to your appointment. However, don’t submit it too early—if your travel dates, employer, or address change, you’ll need a new form and may have to reschedule. Submitting it 2–3 months in advance works well if your plans are fixed.
Having your documents required for DS 160 ready beforehand also speeds up the process. If you’re funding your travel or education, platforms like Niyo can help with seamless foreign exchange management while you handle your paperwork.